I have watched the pros color with Copics. And I've had hands-on learning, too. Still, it took lots of practice to finally feel comfortable with the process. I've now realized that I have a different way of making it work.... different from what I've seen anyway. Maybe it will be right for you, too. Just don't give up!
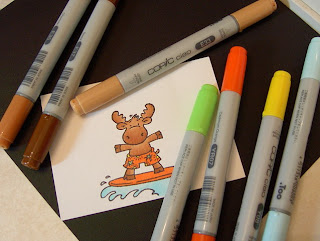
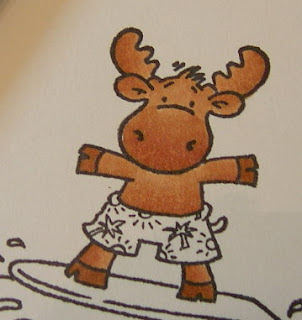
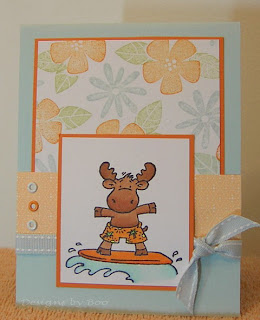
Materials used:Surfer Riley image from Hannah Stamps
Ink: Palette Noir Black
Georgia Pacific white cs
Copics:
Sand E33 (lightest brown)
Chamois E35 (medium brown)
Sepia E37 (darkest brown)
Frost Blue B00
Cadium Orange YR07
Yellowish Green YG06
Acid Yellow Y08
Step 1: Choose one small section at a time. Use your medium brown and outline where you want the shadow.
Step 2: Use your lightest brown. Start at the edge and pull the color out just a short distance. You can do the same distance of pulling 2 or 3 times to get an even shading.
Step 3: Continue to use you lightest brown. Go back to the edge and pull the color out a little further.
Step 4: Finish the first section by pulling the color all the way out to the end of this section.
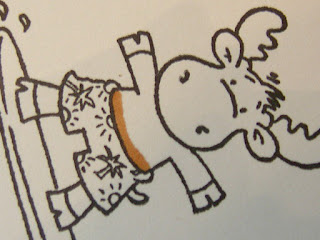
Step 5: Repeat step 1 on a new area. I chose 2 smaller areas (the arms). Use your medium brown to outline the edge for the shadow.
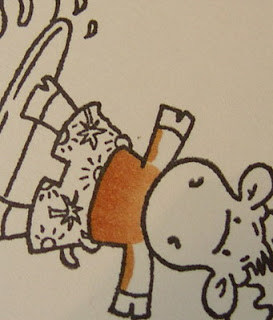
Step 6: Repeat steps 2 and 3 by using your lightest brown and pulling the ink out away from the shadow.
Step 7: Repeat step 1 and use the medium brown for your shadow.
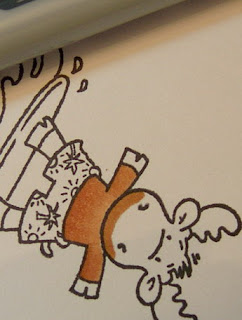
Step 8: Repeat steps 2 and 3 using your lightest brown and starting from the edge of the shadow, pull the color out. Use short strokes first.
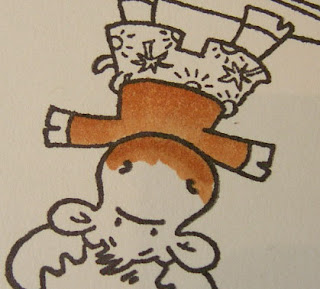
Step 9: Continuing to pull the color out, lengthen your strokes. The more you pull the darker it will get.
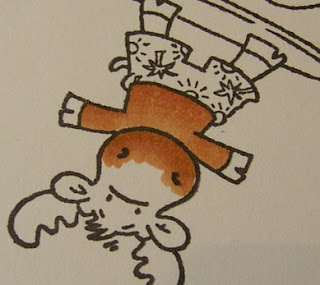
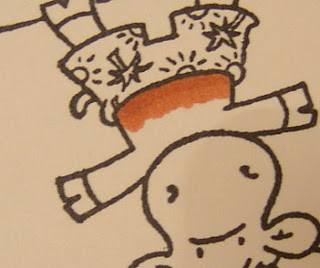
Step 10: You don't always have to use 2 shades. I wanted the ears to be a little lighter. So I only used the lightest shade of brown. But this time, I went over the shadow line 2 or 3 times. Remember the more you color, the darker it gets. Then using the same shade, pull the color out as you did before.
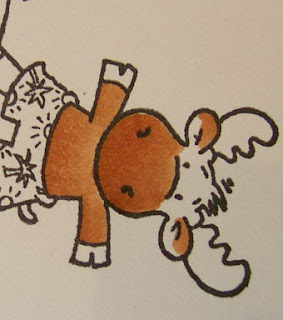
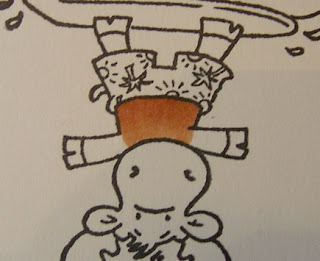
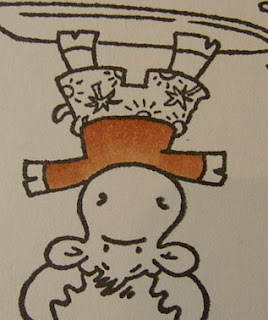
Step 11: With the face, I used just the lightest brown and colored down from the tuff of his fur between the antlers. For the antlers, I used the medium brown for the shadow again.
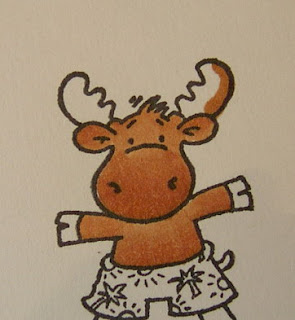
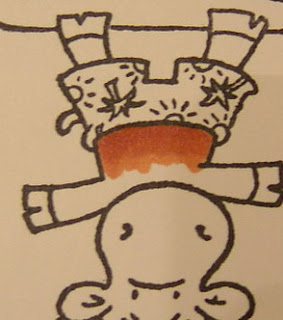
Step 12: Then I used the lighter brown to pull the color across the antlers. I went to the legs and used just the lightest shade of brown like I did for the ears.
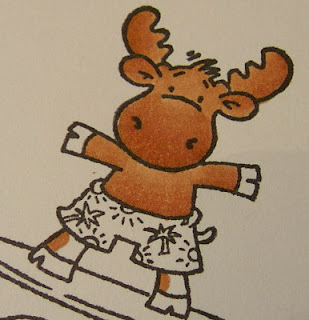
Step 13: I used the darkest shade of brown to fill in the hooves.
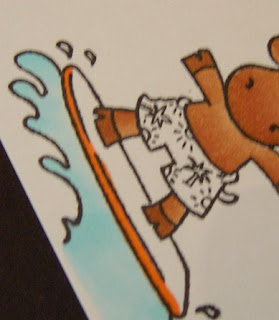
Step 14: I used the frost blue to fill in my shadow. I colored over the shadow a couple of times since I'm using just one shade again. The I pulled the color out.
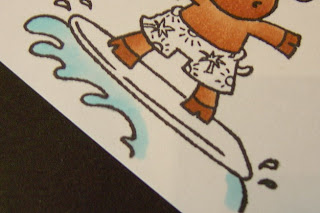
Step 15: For the surf board, I used just one shade of orange. Then I lightly colored the pattern of the swim trunks.
I used
Julee Tillman's Mojo sketch 32 for the card. I thought Bodacious Bouquet would be the perfect compliment for this cute surfer moose. I used the rock & roll technique for the blossoms. I first inked the blossom with apricot appeal and then rolled the edges on the pumpkin pie ink pad.
I sent this card to my wonderful MIL. She LOVED her Hawaii trip last year. This isn't the same as a trip, but Riley sure is cute!
Stamps: Bodacious Bouquet - SU, Surfer Riley - Hannah Stamps
Paper: soft sky, pumpkin pie, apricot DSP, whiteInk: black, soft sky, certainly celery, apricot appeal, pumpkin pieAccessories: Copic Markers, soft sky ribbon, eyeletsTechniques: rock & roll
All paper, ink, and embellishments are from Stampin' Up!
 It's that time of year! Schools out! For the next couple of days, I'll be posting cards in honor of retiring teachers and young graduates. Here are some cards for retiring social studies teachers using the retired set, It's Academic. Both cards measure 4.25 square. I use 4.5 square envelopes from A Muse.


